4 E-Learning Chrome Extensions, plus Interactives and Virtual Field Trips


Chrome Extensions:
1. Mote for Audio Comments
2. Bitly for Link Shortening:
3. Nimbus for better Screen Captures
4. Grade Transferer to copy from Classroom to Powerschool

Interactives with Google Tools:
5. Drag n' Drop Activities
6. Virtual Field Trips

=============================================

1. Mote for Audio Comments:
You can quickly record audio feedback within Google Docs, Slides, or Google Classroom (as private comments) using the Mote Chrome Extension. It will automatically create a link within the comment where students can listen to the recording (no login needed for students) AND will transcribe your audio to text in the comment.


2. Bit ly for Link Shortening:
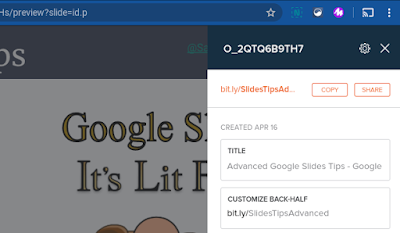
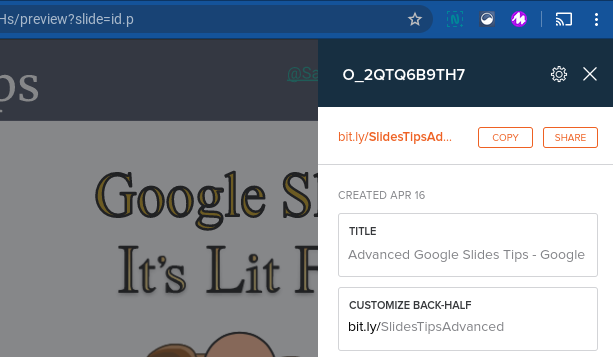
Set up an account using your Google login at bit.ly, then use the Bitly Chrome Extension to quickly shorten and customize links to a site or doc you are at. This is especially useful for those long Google Docs links, links that you want people to remember or be able to type in, or to just save space. For example, bit.ly/ChromebookTutorials

You can even bitly the "/present" or "/copy" version of a Doc (see this slide for an explanation on that) to force people to get a specific view of the Doc/Slide, like i did with the the Meet info for parents at bit.ly/MeetStudentsMMS.


3. Nimbus for better Screen Captures:
While your Chromebook has screen capture functionality, you may like the expanded functionality and ease of use of the Nimbus Chrome Extension.  Try out the features, which include screenshotting the entire webpage (even the part not visible on your screen), editing the screenshots, and even a screen recorder.


4. Grade Transferer to copy grades from Classroom to Powerschool:
More quickly and efficiently copy gradebook data from Google Classroom into Powerschool using the Grade Transferer Chrome Extension. They have a video demonstrating how to save time with this tool. 


5. Drag n' Drop Activities:
Shout out to Nick (Drawings) and Lisa E. (Slides) at D83 for using Google tools to create Drag n' Drop activities for students. By sharing them in Classroom "Make a Copy for Each Student," each student gets an editable interactive. Here's Nick's example in Drawings:
   ^Follow Mr. Leonardi on Twitter for more!^


6. Virtual Field Trips:
I previously shared how students can go on self-paced Google Expeditions from home, but there are a few other ideas for virtual field trips:
===========================================

Hope you find these helpful!


Google Meet "Grid View" Extension!


Currently, holding a large Google Meet video conference can make it difficult to see all participants. Fortunately, there is now a Chrome Extension called “Google Meet Grid View” that allows you to view many more screens at once in a grid:


Steps:
  1. Make sure you are on Google Chrome and logged into your school account:

  1. Go to the “Google Meet Grid View” Chrome Extension page. Click “Add to Chrome”
  2. The extension will be added to your Chrome Extensions:
    You do not need to click it or do anything with it.
  1. Now, when you’re in a Google Meet you will see this button at the top:

  2. Click that button to put your Meet session into “Grid View” mode. (Click again it to return to your previous viewing mode.)

My Thoughts: Use of Google Meet is skyrocketing right now, as you may imagine. Google is scrambling to update the app daily in response to teacher requests and feedback. My guess would be that this, as an often-requested feature, will eventually be integrated into the Meet app, making the use of a Chrome Extension unnecessary. But until that happens, this is a great solution!


Side by Side Windows on Chromebooks


Having two windows or tabs side-by-side on your screen is useful for drag & drop, taking notes, comparing documents, or otherwise multitasking. Here's how to do it on your Chromebook.

Video Demonstration


1. Resize your current window by going to the top right corner and clicking the middle button to take it out of full-screen mode.


2. Click and hold on the solid bar at the top of your window (next to where tabs are) and drag it to one side of your screen.  Don't stop until your mouse touches the edge of your screen and you see a rectangular "shadow" image cover half your screen:


3. Let go of the mouse. It should now dock that window to the side of the screen.
4. Repeat that process with any other window - Chrome or another application - on the other side of the screen. In this example, I am docking my "Files" app to have access to my Downloads.

Bonus #1: You can do this with Tabs in Chrome too!  Just click and hold the tab and drag it out of the window and to the edge of your screen.


Bonus #2: The keyboard shortcut to accomplish this is Alt + Square Brackets: 
Dock to left side:  Alt + [
Dock to right side:  Alt + ]


Enjoy!


Email Audio Alerts


If you want to step away from your computer but want to still hear if an email
comes through, you can take these steps:

1. Go to your Gmail Settings:


2. Scroll down and enable notifications:
(there may also be a blue link to click above "New mail notifications on"

3. Install a Chrome Extension
Gmail on a computer does not play audio on incoming email messages. 
You need a Chrome Extension. I like this one:
Gmail Audio Alerts 
Then, in your Chrome menu bar, click the extension to set up your sound.
Make sure your volume is on.

There are other Chrome Extensions that do the trick, but this one is simple, and of course has the AOL sound which we all love. Hope this helps!

Originality Reports in Google Classroom


The two most recent updates - Rubrics and Originality Reports - are now available to all users.

Originality Reports compare a student's work against millions of webpages and books, and produce a report showing the percent that may have been plagiarized or in need of citation.

For now, you can only turn on Originality Reports in Google Docs assignments, and you only get to use them on 3 assignments per classroom. After 45 days, an Originality Report expires and you can run a new one for another assignment.


Here's how to set up an Originality Report:

1. Create an Assignment and attach a Google Doc "Each Student Gets a Copy."   Check the "Originality Report" checkbox:

2. When students go to turn in work, they will have the option of running their own Originality Report to detect uncited passages before turning in their work:

3. When you are reviewing a student's work, in the right-side panel under their name you will see a link to run an Originality Report. Any flagged text will be identified here.

If this is a past assignment and you didn't previously set it up with an Originality Report, you can run it on the assignment from here.

4. Clicking the link will open up a full report that includes summaries of the amount plagiarized and the sources they match:

With the limited number of reports you can run, this is best used on a major assessment, like an end-of-unit essay.  It's also worth noting that if you're giving students a template using an assignment you found online, any instructions or questions you have pre-embedded into the doc may flag the plagiarism checker (I've had similar experiences in the past with TurnItIn.com). 

Still, this is a step in the right direction for Google Classroom moving more towards being a full service Learning Management System.  


5 Chromebook Settings to Set


Your Chromebook is highly customizable to your needs.  Adjusting these 5 built-in settings will greatly improve your user experience and effectiveness on your Chromebook. Try them out, then teach them to your students!


  1. Personalization
  2. Accessibility
  3. Language
  4. Map Keyboard
  5. Download Location


First, Find Your Settings


Chrome OS Settings (for the device) can be found by clicking on the time (bottom right of screen) and clicking the gear icon:


This will bring up the Settings screen, from which you can either click categories on the left side, or do a keyword search at the top (my preferred method) for each of the 5 settings I'm about to share.


Got your Settings screen ready? Let's customize!


1. Personalization

Who doesn't love some new wallpaper and a profile pic for a fresh start? Click Personalization on the left, or type it into the Search bar.

2. Accessibility

Search for Accessibility and then click Manage accessibility features to try out the built-in supports, like a magnifying glass, text-to-speech, and enlarged cursor.  
I recommend toggling on that first "Always show accessibility..." switch - it will make accessibility features more accessible by putting them in your system menu:

3. Languages and Inputs

Search for "Languages" to add an additional language to your system text, keyboard, and voice-to-text settings.

Add languages by clicking where you see the circles below:
Toggling on Show input options in the shelf (by the red arrow) will make changing between keyboards easy by putting a button at the bottom of your screen:

4. Map Keyboard

This is especially useful if you're using another device you're more familiar with, such as an Apple iMac or MacBook, and you want the key combinations to match. Search for Keyboard and open it to reveal the ability to change which key controls which function.
For example, in this picture I changed my "Control" key to be my "Alt" key, and vice versa.  This mapping matches my iMac keyboard's layout, so now my fingers can move in familiar ways to do things like copy, paste, switch tabs, etc.

5. Set Location of Downloads

When you save a file, where should it go? What about Screenshots? Set this important feature up using your Chrome Settings, meaning first you need to open the Chrome browser, then click the three dots in the top-right corner, abd find Settings. 

Now, search for Downloads:

As you can see, mine was set up to save all files to my Google Drive account. While it's an awesome feature of Chromebooks that my Drive appears like a set of folders on the device, I don't want to automatically save every file there.

Especially important is that my screenshots will auto-save to this location, cluttering up my Drive. I'd rather save them to my Downloads folder on the Chromebook.

So I click Change and then select the Downloads folder, and save my choice using the blue Open button. (Note: You can create new folders in your Downloads folder to further organize files on your device!)

Don't forget to toggle on Ask where to save if you'd prefer to choose a location each time you download a file.


These are just a few of the many features your Chromebook lets you personalize. You've customized your new vehicle, now take it for a test drive!

8 Essential Keyboard Shortcuts for Chromebooks


Whether you're transitioning from a different device or just looking to become a keyboard ninja, these shortcuts are essential on a Chromebook. 

Here are 5 Shortcuts You Need... followed by 3 you wish your students didn't know!

  1. Top Row
  2. Screenshots
  3. Zoom
  4. Caps Lock
  5. Dock Window
  6. Rotate Screen
  7. Log Out
  8. Restart

1. Top Row

The top row of keys have unique functions on a Chromebook and should be your starting point for learning the device:


2. Screenshots

Snap a quick pic of the whole screen with Ctrl + Switch key:


Select just a portion of your screen by adding the Shift key.  You'll then need to click and drag the area you want to select:


You'll see this popup, where you can click the picture to go open the file, or "Copy to Clipboard" for immediate copy/paste action.


3. Zoom

Use these keys to change the zoom level on your screen:

Ctrl and + = Zoom in
Ctrl and -  = Zoom out
Ctrl and 0  = Reset Zoom to default (100%)


4. Caps Lock

You went looking for Caps Lock, and found only a search button in its place. Never fear, Alt + Search is here!

(Press the Shift key when you're ready to turn Caps Lock off!)


5. Dock Windows Side-By-Side

If you need to use multiple apps or browser windows, using the Ctrl + Bracket Keys will cut your current app's screen space in half, and attach it to the side of your screen, allowing you to open another app side-by-side:


And now, 3 shortcuts your students know (but you wish they didn't.... Because they do them to each others' keyboards.... Constantly. #MiddleSchoolLife)


6. Rotate Screen

Ctrl + Shift + Refresh rotates the screen 90 degrees.   

This has only occasional usefulness... but good to know for when a kid rotates someone else's screen. 

7. Log Out

Ctrl + Shift + QQ: Press the Q twice while holding the other two keys, and you immediately log out of the Chromebook. 


8. Restart

When in doubt, a Restart solves many common problems or glitches. This requires the refresh key on the keyboard AND the power button on the side of the device.


Now go forth, keyboard ninja, and conquer your Chromebook!